Fabric Manipulation Techniques
Bias cut refers to a technique where the fabric is cut at a 45‑degree angle to the grain, allowing the material to stretch and drape more fluidly. This method is essential for garments that require a soft, flowing silhouette, such as a bias…
Bias cut refers to a technique where the fabric is cut at a 45‑degree angle to the grain, allowing the material to stretch and drape more fluidly. This method is essential for garments that require a soft, flowing silhouette, such as a bias‑wrapped dress or a flared skirt. Practically, the designer must first identify the selvage edge, then measure the diagonal across the fabric to locate the bias line. One common challenge is the tendency of bias‑cut pieces to stretch unevenly during stitching, which can cause distortion of the pattern. To mitigate this, use a longer stitch length and a walking foot on the sewing machine, and press seams with a light hand to preserve the fabric’s natural give.
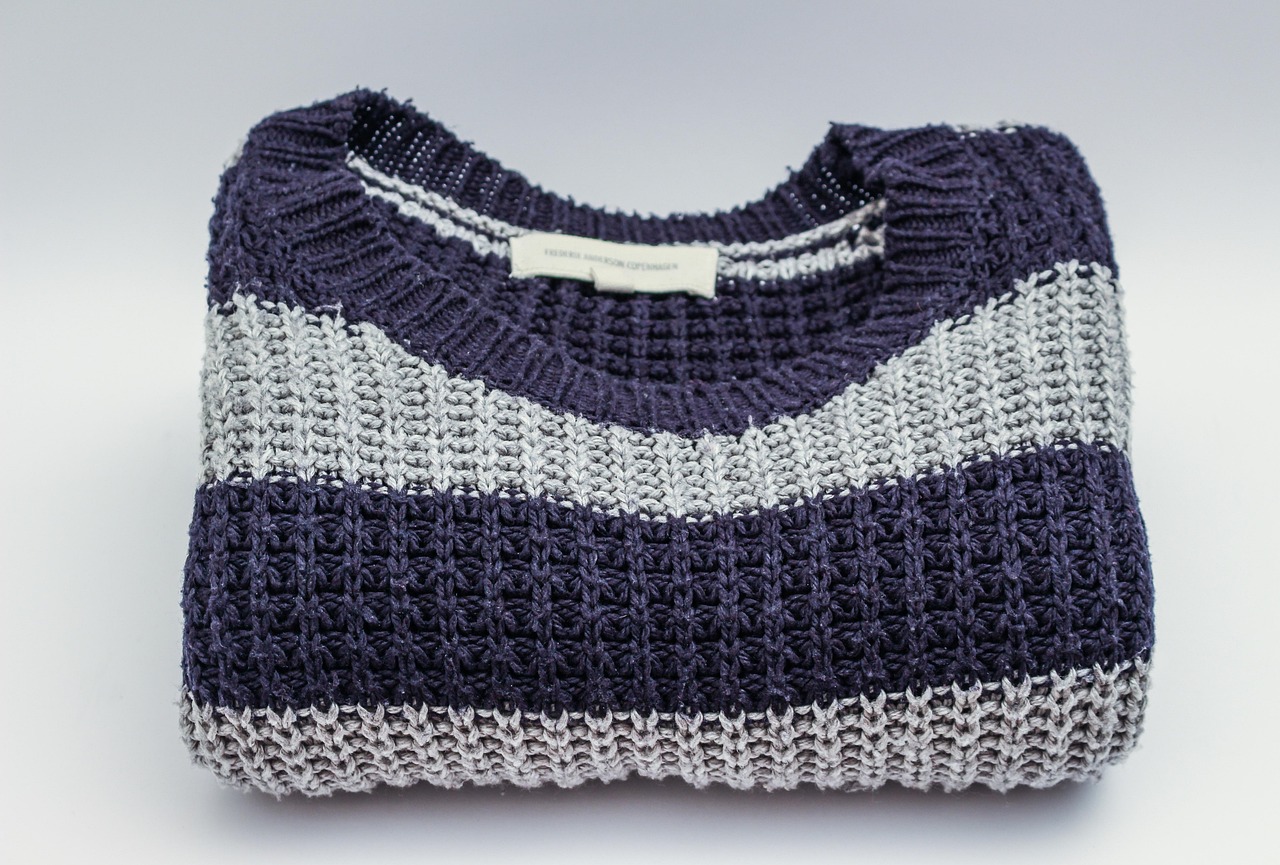
Grain denotes the orientation of the threads in woven fabric. The warp grain runs parallel to the selvage, while the weft grain runs perpendicular. Understanding grain is critical when altering a garment because cutting on the straight grain ensures stability, whereas cutting on the bias introduces flexibility. For example, a tailored jacket’s front panels are cut on the straight grain to maintain structure, while a skirt’s panel may be cut on the bias for a softer fall. Misidentifying grain can lead to garments that warp or stretch out of shape after wear.
The selvage is the tightly woven edge of the fabric that prevents fraying. It is also a reference point for measuring grain and bias. When performing alterations, the designer often aligns seam allowances with the selvage to maintain consistent tension across the garment. A practical application is the creation of a bias binding, where the fabric is folded along the bias and sewn to finish raw edges. A common difficulty is the tendency of the selvage to roll, which can be controlled by pressing it flat before cutting.
Nap describes the direction of the raised fibers on certain fabrics, such as velvet, corduroy, or brushed knits. The nap creates a subtle sheen that changes based on the angle of light. When cutting or stitching, it is vital to keep the nap consistent; otherwise, the finished piece may appear unevenly colored. For instance, a velvet blazer should have all pattern pieces cut with the nap facing the same direction to avoid a patchwork effect. A challenge arises when the nap is directional but the fabric is printed; the designer must decide whether visual consistency of color or texture takes precedence.
Pile is similar to nap but refers specifically to the raised loops or tufts on fabrics like terry cloth or plush. The pile can be either cut (as in velvet) or left uncut (as in terry). In alterations, the pile can be distorted by heavy handling, leading to a flattened appearance. When adding decorative elements such as embossed appliqué, the designer must consider the pile’s direction to maintain a uniform texture across the garment surface.
Drape measures how a fabric falls and conforms to the body. Fabrics with high drape, such as silk chiffon or jersey, create fluid silhouettes, while stiff fabrics like taffeta hold shape. Understanding drape is essential when deciding which manipulation techniques to apply. For example, a designer may use godet inserts to add volume to a draped skirt without compromising the fabric’s flow. A frequent challenge is that fabrics with too much drape can become clingy, requiring the addition of interfacing or boning to provide support.
Pleat is a fold in fabric that is pressed and secured to create volume or decorative detail. There are several types, each with distinct construction methods. A knife pleat is a single, sharp fold, while a box pleat consists of two opposite folds meeting at a central point, forming a “box.” An accordion pleat creates a series of narrow, evenly spaced folds that expand and contract like an accordion. The designer must calculate the correct amount of fabric for each pleat type; a miscalculation can lead to uneven spacing or excess bulk. Practical applications include using knife pleats for a sleek, modern skirt, or box pleats for a structured, architectural look. Challenges often involve maintaining consistent pleat depth, especially when working with slippery fabrics; a temporary basting stitch can help hold pleats in place during pressing.
Smocking is a decorative gathering technique that creates a series of small pleats stitched together in a pattern, often used in children’s garments and bridal wear. The process involves marking the fabric with equally spaced dots, then stitching across these marks with a series of parallel rows to form a honeycomb or diamond motif. Smocking adds elasticity and visual interest, especially when applied to a lightweight fabric such as cotton voile. A practical tip is to use a smocking foot on the sewing machine to keep the fabric flat while stitching. One challenge is that dense smocking can add thickness, making it difficult to layer under other fabrics; selecting a fine thread and adjusting stitch tension can alleviate this issue.
Shirring is a method of gathering fabric by stitching parallel rows of elasticized or non‑elastic thread, then pulling the thread to create fullness. Shirring is commonly used on bodices, sleeves, and cuffs to add stretch and decorative texture. When applying shirring to a non‑stretch fabric, the designer may insert elastic thread in the bobbin to create a subtle give. An example is a shirred waist on a fitted dress, which provides a flattering hourglass shape. A typical challenge is the tendency for the gathers to become uneven if the thread tension is inconsistent; using a consistent stitch length and tension setting is essential for uniformity.
Ruching involves fabric manipulation similar to shirring but often uses a series of small, irregular folds that are stitched in place. Ruching is typically applied to create decorative texture on skirts, sleeves, or neckline trims. It can be executed by hand or machine, with the fabric first being pulled into a series of small pleats and then secured with a line of stitching. A practical application is a ruched side panel on a sheath dress, which adds visual interest and subtle volume. Challenges include the added bulk that can affect the garment’s drape; selecting a lightweight fabric and using a fine needle can reduce this effect.
Embossing is a technique that creates a raised pattern on fabric by applying heat and pressure through a patterned die. This method is popular for creating subtle, textural designs on leather, synthetic blends, and heavyweight cottons. In the context of alterations, embossing can be used to add decorative panels to a jacket without the need for stitching, thereby preserving the garment’s clean lines. A practical consideration is the need for a heat‑resistant surface and proper ventilation when embossing synthetic fabrics, as they may release fumes. One challenge is achieving consistent depth across the entire pattern; testing on a scrap piece before applying to the final garment helps ensure uniform results.
Appliqué involves attaching a piece of fabric onto a base fabric to create a decorative motif. The process can be executed by hand or machine, often using a zigzag stitch to secure the edges. Appliqué is frequently used to add logos, patches, or intricate designs to jackets and denim. For advanced alterations, designers may combine appliqué with embroidery to enhance texture. A practical tip is to use a fusible backing on the appliqué piece to keep it in place during stitching. Challenges include preventing puckering on stretchy fabrics; a stabilizer placed underneath the appliqué can help maintain a smooth surface.
Quilting is the process of stitching together two or more layers of fabric, typically a top layer, batting, and a backing, to create a padded textile. In fashion design, quilting is employed for jackets, skirts, and accessories that require added insulation and visual depth. Hand quilting offers greater control over stitch direction and density, while machine quilting provides speed and uniformity. A common challenge is aligning the stitching on patterned fabrics; using a quilting ruler and marking the stitch lines beforehand can improve precision.
Matelassé is a type of quilting that creates a raised, embossed pattern without the need for a separate batting layer. The effect is achieved by stitching the top and backing fabrics together in a specific pattern, then applying heat and pressure to puff the stitches. This technique is popular in evening wear and outerwear for its luxurious texture. Practical application includes a matelassé panel on a coat sleeve, offering both warmth and visual interest. The main difficulty lies in controlling the amount of heat to avoid scorching the fabric; a low‑heat press with a protective cloth is recommended.
Boning refers to thin strips of rigid material, often made of steel, plastic, or synthetic fibers, inserted into garment seams to provide structure. Boning is essential in corsetry, bodices, and certain types of dresses that require defined shaping. When inserting boning, the designer creates a channel, known as a boning pocket, which is sewn into the garment’s interior. A practical example is using flexible plastic boning in a sheath dress to maintain a sleek silhouette without sacrificing comfort. Challenges include ensuring the boning does not protrude through the fabric, which can be addressed by using a protective lining and checking the pocket’s width before insertion.
Interfacing is a supportive material that is fused or sewn to fabric to add stability, especially in collars, cuffs, and button plackets. There are two main categories: fusible interfacing, which has an adhesive side activated by heat, and non‑fusible interfacing, which must be sewn in place. For alterations, selecting the appropriate weight and type of interfacing is crucial; a lightweight fusible interfacing may be suitable for a delicate blouse, while a heavyweight non‑fusible interfacing is better for a structured coat. A frequent challenge is the tendency of fusible interfacing to melt or become brittle on heat‑sensitive fabrics; testing on a scrap piece helps prevent damage.
Stabilizer is a temporary or permanent reinforcement used to support fabric during stitching, especially on stretchy or sheer materials. Stabilizers can be made of tear‑away, wash‑away, or cut‑away types, each offering different levels of durability. In advanced alterations, a cut‑away stabilizer may be applied to a silk satin panel before embroidering to prevent puckering. A practical tip is to trim excess stabilizer after stitching to reduce bulk. One challenge is selecting a stabilizer that matches the fabric’s weight; a too‑heavy stabilizer can cause the garment to feel stiff, while a too‑light one may not provide sufficient support.
Seam finish refers to the method used to prevent raw edges from fraying and to reinforce the seam. Common finishes include overlock stitching, flat‑felled seams, and French seams. Each finish offers distinct aesthetic and functional benefits. An overlock stitch quickly trims and finishes edges, ideal for knit fabrics; a flat‑felled seam creates a clean, durable finish for denim; a French seam encloses seam allowances within the seam, providing a polished look for lightweight woven fabrics. Challenges arise when applying a particular seam finish to a fabric with a high nap, as the stitching may distort the surface; a gentle press and careful handling can preserve the fabric’s appearance.
Overlock machines, also known as sergers, simultaneously stitch, trim, and finish edges in a single pass. Overlock stitching is especially useful for knit fabrics, as it provides stretch and prevents unraveling. In the context of alterations, an overlock can be used to finish a newly cut neckline or to reinforce a repaired seam. A typical difficulty is tension adjustment; improper tension can cause the seam to pucker or the fabric to stretch unevenly. Regularly testing on a scrap piece and calibrating the machine ensures consistent results.
Flat‑felled seam is a strong, durable seam commonly used in workwear and denim garments. The technique involves folding one edge of the seam over the other and stitching it down, creating a flat, sturdy finish. When altering a pair of jeans, the designer may replace a worn‑out flat‑felled seam with a new one to restore durability. A challenge is that the seam adds bulk, which can affect the garment’s fit; using a narrow seam allowance and pressing the seam carefully can minimize this impact.
French seam is a neat, enclosed seam where the fabric edges are first sewn together inside out, then trimmed, and finally sewn again right side out, encasing the raw edges. This finish is ideal for delicate or sheer fabrics such as organza or chiffon. In advanced alterations, a French seam can be used to repair a torn hem on a silk blouse, preserving the garment’s elegance. The main challenge is the extra time required to complete the double stitching; a sharp needle and precise alignment help streamline the process.
Serger stitch refers to the specific stitch formation created by an overlock machine, often a combination of multiple threads that interlock the fabric edges. Different serger stitches, such as a 3‑thread overlock or a 4‑thread safety stitch, provide varying degrees of strength and stretch. Selecting the appropriate serger stitch is key when reinforcing a repaired seam on a stretch fabric; a 4‑thread safety stitch offers extra durability. A common issue is thread breakage due to high tension; adjusting the tension sliders and using high‑quality thread reduces breakage.
Edge is the boundary of a fabric piece where it meets the surrounding material or where it terminates. Proper edge treatment prevents fraying and contributes to the garment’s overall finish. Techniques for edge treatment include hemming, rolled hem, and blind hem. Each method serves a specific aesthetic purpose. For example, a rolled hem is often used on lightweight fabrics to create a low‑profile finish, while a blind hem is ideal for formal wear where visible stitching is undesirable. Challenges include maintaining an even hem on fabrics with a high nap, which may require careful pressing and a fine needle.
Hem is a folded edge that is stitched to prevent fraying and to finish the garment’s bottom edge. Hems can be single‑fold, double‑fold, or decorative. In alteration work, a double‑fold hem may be added to a skirt that has been shortened, ensuring a clean finish that matches the original design. A practical tip is to use a hem gauge to maintain consistent hem width. A frequent difficulty is that heavy fabrics can cause the hem to curl; pressing with a steam iron and using a suitable stitch length helps keep the hem flat.
Blind hem is a hem that is sewn with a stitch that is nearly invisible on the exterior of the garment. This technique is frequently employed on formal dresses and trousers where a discreet finish is desired. The blind hem stitch catches only a few threads of the fabric, creating a subtle line that blends with the material. When altering a tailored pant leg, the designer may use a blind hem to shorten the length without compromising the sleek appearance. The main challenge is that the stitch can break if the fabric is too thick; using a longer stitch length and a sharp blind hem needle mitigates this issue.
Rolled hem creates a narrow, rolled edge that is secured with a series of tiny stitches. This finish is ideal for lightweight, sheer fabrics such as chiffon or organza, as it adds minimal bulk while preventing fraying. In alteration, a rolled hem may be added to a veil or a delicate blouse sleeves. A practical approach is to use a rolled‑hem foot attachment on the sewing machine, which guides the fabric through the rollers and stitches simultaneously. A challenge is that the rolled hem can unravel if the fabric is overly slippery; using a light press and a fine thread helps maintain the integrity of the edge.
Facing is a piece of fabric that is sewn to the inside of a garment to finish an edge, such as a neckline or armhole, and to provide structure. Facings can be cut from the same fabric as the garment for a seamless look, or from a contrasting fabric for a decorative effect. When altering a bodice, a designer may replace a worn facing with a new one to restore shape and durability. A common difficulty is aligning the facing with the garment’s edge without puckering; basting the facing in place before final stitching helps ensure a smooth finish.
Underlining is a layer of fabric sewn beneath a garment to add opacity, support, or warmth. Underlining is often used in skirts and dresses made from sheer or lightweight fabrics. In advanced alterations, a designer may add an underlining layer to a summer dress to increase coverage while retaining the original aesthetic. The underlining should be cut slightly smaller than the outer fabric to avoid bulk at the seams. One challenge is that the added layer can affect the garment’s drape; selecting a thin, lightweight underlining material helps preserve the original flow.
Lining is a complete inner layer of fabric that covers the interior of a garment, providing comfort, concealment of construction, and a polished finish. Lining is common in jackets, coats, and dresses. When altering a coat, the designer may replace a damaged lining with a new one to restore the garment’s functionality. The lining should be chosen to complement the outer fabric in weight and breathability. A typical challenge is ensuring that the lining does not shift within the garment; using a stay stitch along the edges secures the lining in place.
Interlining is a lightweight layer of fabric placed between the outer fabric and the lining to add shape and support without adding bulk. Interlining is especially useful in tailoring, where a subtle structure is needed for collars, cuffs, and lapels. For example, a tailored blazer may incorporate a soft wool interlining in the lapel to maintain crispness. Selecting the appropriate interlining weight is crucial; too heavy an interlining can stiffen the garment, while too light may not provide the desired shape. A challenge is that some interlinings may shrink when washed; pre‑washing or dry‑cleaning the interlining before use can prevent unexpected changes.
Canvas is a stiff, woven fabric used in garment construction to provide shape and support, particularly in coats and jackets. Horsehair canvas, a traditional type, offers excellent body and durability. In alteration work, a designer may replace a worn canvas in a trench coat to restore its silhouette. The process involves removing the old canvas, cutting a new piece to match the original shape, and stitching it into place using a strong seam. The main difficulty is ensuring the new canvas aligns perfectly with the garment’s pattern pieces; careful measurement and trial fitting are essential.
Horsehair canvas is a specific type of canvas reinforced with horsehair fibers, delivering superior rigidity and resilience. It is commonly used in high‑end tailoring for its ability to hold shape while allowing slight flexibility. When repairing a tailored coat, inserting a new horsehair canvas can rejuvenate the garment’s structure. A challenge is that horsehair canvas can be difficult to sew through due to its density; using a heavy‑duty needle and a walking foot aids in achieving a clean stitch.
Stay is a flexible strip, often made of synthetic material, used to provide support in areas such as the bust or waist. Stays differ from boning in that they are generally more flexible and can be sewn into a garment without creating a dedicated pocket. In alteration, a designer may add stays to a fitted dress to enhance bust support without sacrificing comfort. A practical tip is to position stays just below the bust line and secure them with a double‑stitch. Challenges include ensuring the stays do not dig into the wearer’s skin; selecting a soft, flexible material and proper placement mitigates discomfort.
Stiffening refers to the process of adding substances or materials to a fabric to increase its rigidity. Stiffening agents can be spray‑on starch, fabric glue, or specialized sprays designed for delicate fabrics. In advanced alterations, stiffening may be applied to a ruffle to maintain its shape during wear. A common difficulty is that over‑stiffening can cause the fabric to crack or become brittle; applying the agent in thin, even layers and testing on a sample piece helps achieve the desired level of firmness.
Starch is a common stiffening agent applied to fabrics to give them a crisp, smooth finish. Starch can be diluted to various concentrations depending on the desired effect, from a light sheen to a firm hold. In garment alteration, starch is often used on collars and cuffs to keep them sharp. A practical approach is to spray a light mist of diluted starch, then press with an iron to set the shape. Challenges include the possibility of residue buildup on the fabric; regular cleaning of the garment and using a low‑starch setting can prevent this issue.
Fabric stiffener is a liquid or spray product designed to add body and firmness to fabrics without the need for ironing. It is especially useful for delicate fabrics that cannot withstand high heat. In alteration work, a fabric stiffener may be applied to a lace panel to reduce sagging. The key challenge is achieving uniform coverage; using a fine mist applicator and allowing the fabric to dry completely before handling ensures consistent results.
Pleating machine is a specialized device that creates uniform pleats in fabric automatically. The machine can produce knife, accordion, or box pleats with precision, making it invaluable for high‑volume production or intricate design work. In an advanced certification setting, students may learn to set the pleating depth, spacing, and angle on the machine to achieve custom pleat configurations. A typical difficulty is that the machine may struggle with very heavy fabrics; pre‑testing the fabric’s weight and adjusting the pressure settings can prevent damage.
Hand pleat is a manual technique where the fabric is folded and pressed into pleats without the aid of a machine. Hand pleating allows for greater creativity and variation in pleat size and placement. For example, a designer may hand‑pleat a silk scarf to create an asymmetric look. The main challenge is maintaining consistency across multiple pleats; using a pleat ruler and marking each fold helps ensure uniformity.
Accordion pleat creates a series of narrow, evenly spaced folds that expand and contract like an accordion. This pleat type adds dynamic movement to garments, often used in skirts and skirts with cascading effects. When applying accordion pleats, the designer must calculate the total fabric width required: each pleat consumes twice the pleat depth plus the spacing. A common challenge is that the pleats can open up during wear if not secured; stitching the pleats at the top or using a lightweight interfacing can keep them in place.
Knife pleat is a single, sharp fold that lies flat against the fabric, creating a clean, streamlined appearance. Knife pleats are frequently used in skirts, kilts, and decorative panels. The technique involves folding the fabric in one direction, pressing, and then stitching the pleat in place. A challenge arises when the fabric is too thick, causing the pleat to become bulky; selecting a lighter weight fabric or reducing pleat depth can maintain a sleek profile.
Box pleat consists of two folds that meet in the center, forming a rectangular “box.” Box pleats add volume and structure, making them popular in school uniforms and structured skirts. When constructing a box pleat, the designer must align the inner and outer folds precisely, then secure them with stitching. A practical tip is to pin the pleat at the seam line before sewing to avoid shifting. One difficulty is that the pleat can create a ridge that catches on undergarments; pressing the pleat flat and smoothing the seam line helps reduce this issue.
Godet is a triangular fabric insert sewn into the seam of a skirt or garment to add flare and movement. Godets are often cut on the bias to maximize drape. In alteration, a designer may insert a godet into a plain skirt to increase volume without adding bulk to the entire garment. The key challenge is matching the godet’s grain and nap with the main fabric; cutting the godet on the same bias and aligning the nap ensures a cohesive look.
Flare describes the gradual widening of a garment from a narrower point, such as a skirt that widens from the waist to the hem. Flare can be achieved through godets, pleats, or additional fabric panels. Understanding how to calculate the required additional width is essential for balanced proportions. For instance, a skirt intended to have a 30‑centimeter flare at the hem should have enough added width to achieve this measurement without appearing overstuffed. A common challenge is that excessive flare can cause the garment to shift during movement; adding a lightweight interfacing or incorporating subtle pleats can help maintain shape.
Flounce is a decorative strip of fabric that is gathered or pleated and attached to a garment edge to create a soft, ruffled effect. Flounces are often used on sleeves, skirts, or neckline trims to add visual interest. In alteration, a designer may replace a damaged sleeve cuff with a new flounce to restore the original design. The main difficulty lies in attaching the flounce without creating bulk at the seam; using a narrow seam allowance and stitching with a fine needle helps keep the attachment smooth.
Yoke is a horizontal or vertical section of fabric that joins the shoulders or waist of a garment, providing structure and shaping. Yokes are common in shirts, jackets, and dresses. When altering a shirt, the designer may adjust the yoke’s width to improve fit across the shoulders. A challenge is ensuring the yoke’s grain aligns with the rest of the garment to avoid distortion; marking the grain lines before cutting facilitates accurate assembly.
Panel refers to a distinct piece of fabric that forms part of a larger garment, such as a front panel, back panel, or side panel. Panels can be combined to create complex shapes and design lines. In alteration, replacing a damaged panel may involve cutting a new piece to match the original pattern and stitching it into place with a concealed seam. A frequent issue is matching the pattern print across panels; careful alignment of the print repeat is essential for a seamless appearance.
Gusset is a triangular or diamond‑shaped piece of fabric inserted into a seam to add strength, flexibility, or extra room. Gussets are commonly used in underarm areas of shirts, crotch seams of trousers, and side seams of skirts. In alteration, a gusset may be added to a pair of pants to increase mobility. The challenge is that the gusset must be cut with the correct grain to avoid twisting; cutting the gusset on the straight grain and matching the nap ensures consistent performance.
Bias binding is a narrow strip of fabric cut on the bias and used to finish raw edges, providing a flexible and decorative finish. Bias binding is especially useful on curved edges, such as armholes or necklines. When repairing a torn edge, a designer may apply bias binding to reinforce the seam and add a contrasting color accent. A common difficulty is the tendency of the binding to roll; pressing the binding flat before sewing and using a binding foot can keep it stable.
Bias tape is pre‑made bias‑cut strips that are sold in various widths, ready for use in edge finishing. Bias tape simplifies the process of binding raw edges, especially for beginners. In advanced alteration work, custom bias tape may be created to match a specific fabric color or texture. The main challenge when using bias tape is ensuring it lies flat on the fabric without puckering; using a narrow stitch length and a walking foot helps achieve a smooth finish.
Seam allowance is the area of fabric between the edge of the fabric and the stitching line, typically measured in millimeters or inches. Standard seam allowances vary by garment type: 1 cm for lightweight fabrics, 1.5 cm for medium weight, and 2 cm for heavy fabrics. Accurate seam allowance measurement is essential for proper fit and for allowing enough fabric for alterations. A frequent issue is that an inconsistent seam allowance can cause mismatched seams, leading to uneven edges. Using a seam gauge to mark seam allowances before cutting helps maintain consistency.
Seam ripper is a small cutting tool used to remove stitches without damaging the fabric. In alteration, the seam ripper is indispensable for undoing seams during fitting adjustments. The key to effective use is to insert the blade under the stitch, lift gently, and cut the thread without cutting the fabric fibers. A common challenge is accidentally cutting the fabric, especially on delicate materials; using a sharp, well‑maintained seam ripper and working slowly reduces this risk.
Stitch length is the distance between two consecutive stitches, measured in millimeters. Adjusting stitch length influences the strength and flexibility of a seam. For example, a longer stitch length (3 mm) is suitable for lightweight fabrics to prevent perforation, while a shorter stitch length (2 mm) provides greater strength for heavy denim. In alteration, selecting the appropriate stitch length ensures that repaired seams are both durable and aesthetically pleasing. A typical difficulty is that machines may default to a medium length, requiring manual adjustment; regularly checking the stitch length on a sample piece prevents unintended outcomes.
Tension refers to the amount of pull applied to the thread as it passes through the sewing machine. Proper tension balances the upper and lower threads, creating even stitches. When working with fabrics of varying thickness, tension must be adjusted accordingly. For instance, a low‑tension setting may be needed for a delicate silk to avoid puckering, while a higher tension may be required for a thick wool coat. A common challenge is that incorrect tension can cause looping on the underside or tight stitches on the top side; performing a tension test on a scrap of the same fabric helps calibrate the machine.
Thread weight indicates the thickness of the sewing thread, measured in tex or denier. Lighter thread (e.g., 30 wt) is used for fine fabrics, while heavier thread (e.g., 70 wt) is appropriate for denim or upholstery. Choosing the correct thread weight is crucial for both durability and visual harmony. In alteration, using a thread weight that matches the original garment ensures that the repair is invisible. A difficulty can arise when the thread is too heavy for a light fabric, causing the seam to pucker; switching to a finer thread resolves this issue.
Needle type is selected based on the fabric being sewn. Universal needles work for most woven fabrics, ballpoint needles for knits, and denim needles for heavy cottons. In advanced alteration, a designer may need to switch between needle types when a garment includes both woven and knit sections. A frequent problem is using the wrong needle, which can cause skipped stitches or fabric damage; checking the fabric composition before selecting the needle prevents these errors.
Stitch type defines the shape and function of the stitch, such as straight stitch, zigzag, blind stitch, or decorative stitch. Each stitch type serves a specific purpose: a straight stitch for most seams, a zigzag for stretch fabrics, a blind stitch for hidden hems, and decorative stitches for embellishment. When altering a garment, selecting the appropriate stitch type ensures both functional strength and aesthetic consistency. A challenge arises when the machine’s stitch selector is set to a decorative pattern unintentionally, resulting in uneven seams; confirming the stitch type before sewing eliminates this risk.
Pressing is the act of applying heat and pressure to fabric to set seams, pleats, and hems. Proper pressing techniques involve using the correct iron temperature, steam setting, and protective fabric (such as a pressing cloth) to avoid scorching. In alteration, pressing the seam after each step helps maintain the garment’s shape and reduces bulk. A typical difficulty is pressing a fabric with a high nap, which can cause the nap to flatten; using a low heat setting and a pressing cloth preserves the texture.
Pressing cloth is a thin piece of fabric, often cotton or muslin, placed between the iron and the garment to protect delicate fibers from direct heat. When working with silk, satin, or synthetic blends, a pressing cloth prevents shine or scorching. A practical tip is to dampen the pressing cloth slightly to enhance steam penetration, especially for fabrics that are difficult to press. The main challenge is that the cloth can become saturated and leave moisture on the garment; wringing out excess water before use maintains a dry pressing environment.
Marking tools include tailor’s chalk, fabric pens, and washable markers used to outline cut lines, grain, darts, and placement points. Accurate marking is essential for precise alterations. For example, using a water‑soluble pen on a dark fabric ensures visibility without leaving a permanent mark. A challenge is that some marking tools can bleed through thin fabrics; testing on a scrap piece before applying to the final garment prevents unwanted staining.
Tailor’s chalk is a traditional marking tool that leaves a faint, removable line on fabric. It is especially useful on heavy fabrics like denim, where a visible guide is needed. In alteration, chalk can be used to indicate seam allowance adjustments or to trace a new pattern piece. The downside is that chalk can smudge if the fabric is handled without care; fixing the chalk with a light mist of spray starch helps set the line.
Fabric grainline is the visual indicator on a pattern that shows the direction of the fabric’s straight grain. Aligning the grainline correctly during cutting ensures that the garment hangs properly and maintains its shape. In alteration, the designer may need to realign a pattern piece to match an existing seam, especially when repairing a torn panel. A common issue is cutting fabric on the bias when a straight grain is required; checking the selvage and confirming the grainline before cutting prevents this error.
Pattern alteration involves modifying the original pattern to accommodate changes in size, style, or design. Adjustments may include lengthening a skirt, adding a dart, or widening a sleeve. Advanced alteration requires careful calculation of seam allowances, ease, and proportion. For instance, increasing a waist measurement by 2 cm may require adding 4 cm to the side seams to maintain balance. A challenge is ensuring that the altered pattern maintains the garment’s original aesthetic; creating a muslin mock‑up before cutting the final fabric helps verify the changes.
Muslin mock‑up is a prototype made from inexpensive muslin fabric used to test pattern alterations and fit before cutting the final, more expensive material. This practice allows designers to experiment with changes, such as moving a dart or adjusting a hem, without risking the primary fabric. In an advanced certification setting, students are encouraged to construct muslin prototypes for each major alteration to identify potential issues early. A typical difficulty is that muslin may behave differently from the final fabric, especially in drape; accounting for these differences by adjusting tension and ease accordingly improves accuracy.
Ease is the amount of extra space built into a garment to allow for movement and comfort. Ease is calculated as the difference between body measurements and garment measurements. For example, a shirt may have 5 cm of ease at the bust for a relaxed fit. In alteration, adjusting ease involves adding or removing fabric at strategic points, such as taking in side seams or adding panels. A challenge is achieving the right balance; too much ease can result in a baggy garment, while too little can restrict movement. Using a fit model to assess comfort after alterations helps fine‑tune the amount of ease.
Fit model is a person whose measurements closely match standard sizing, used for evaluating garment construction and alterations. In a certification course, fit models provide real‑world feedback on how alterations affect comfort, mobility, and appearance. The designer can observe how a modified seam or added boning impacts the overall silhouette. A common challenge is that fit models may have slight variations in posture or body shape; taking multiple measurements and noting any deviations ensures that alterations are appropriately tailored.
Garment construction encompasses the series of steps taken to assemble a piece of clothing, from cutting
Key takeaways
- To mitigate this, use a longer stitch length and a walking foot on the sewing machine, and press seams with a light hand to preserve the fabric’s natural give.
- Understanding grain is critical when altering a garment because cutting on the straight grain ensures stability, whereas cutting on the bias introduces flexibility.
- When performing alterations, the designer often aligns seam allowances with the selvage to maintain consistent tension across the garment.
- A challenge arises when the nap is directional but the fabric is printed; the designer must decide whether visual consistency of color or texture takes precedence.
- When adding decorative elements such as embossed appliqué, the designer must consider the pile’s direction to maintain a uniform texture across the garment surface.
- A frequent challenge is that fabrics with too much drape can become clingy, requiring the addition of interfacing or boning to provide support.
- Challenges often involve maintaining consistent pleat depth, especially when working with slippery fabrics; a temporary basting stitch can help hold pleats in place during pressing.